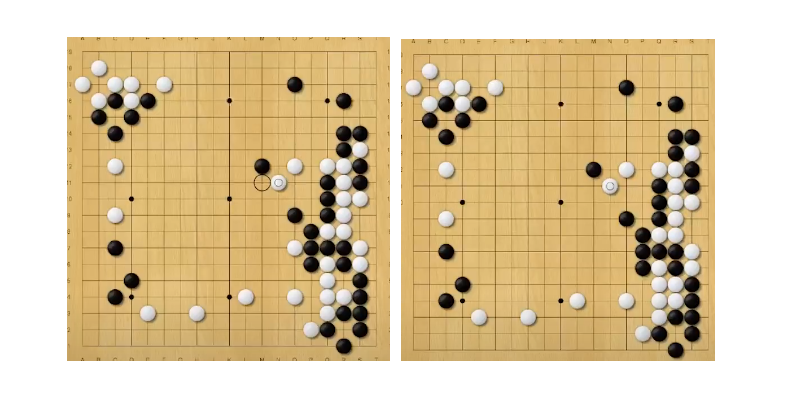
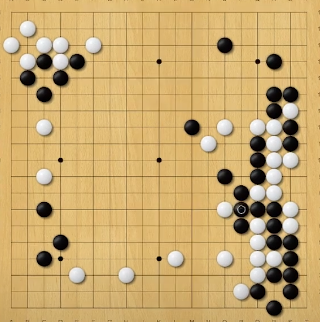
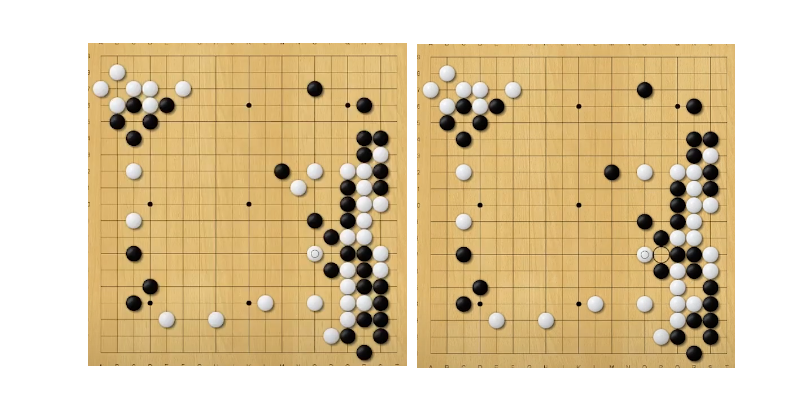
Shape
Intro: Basic Concepts of Go #2: Shape
Perhaps there are some people that question the importance of shapes. Is it really that important?
Of course there are cases where playing the bad shape turns out to be a good move, but if you ignore shape, the efficiency of your stones will go down. So, it's highly advisable to just remember these shapes so that you immediately recognize them.
The important thing to prioritize here is to learn how to play using the proper form. This means using good shape and using theory to make consistent choices. Then and only then, do we start remembering the exceptions. If we don't approach it in this order, there will be no traction and nothing will stick.
How do we think about shape?
When it comes to foundational knowledge, these shapes are like the basics of basics. Just by getting exposure to these shapes, you will instantly recognize them in your games and be able to immediately start avoiding the most common mistakes.
Of course active learning and acquiring new skills and knowledge contribute to your improvement, but negating the worst habits will double the effectiveness of your efforts.
For this reason, this article is quite dense and will be comprised of 5 chapters.
Table of Contents
Bad Shape #1: Empty Triangle
Bad Shape #2: Split Shape
Bad Shape #3: Raw Peep
Good Shape #1: two stone walls need three space extensions
Good Shape #2: hane at the head of two stones
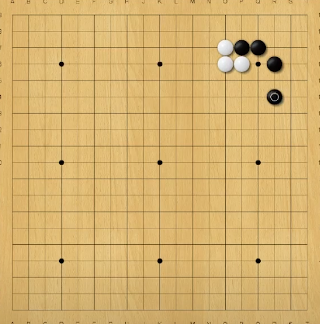
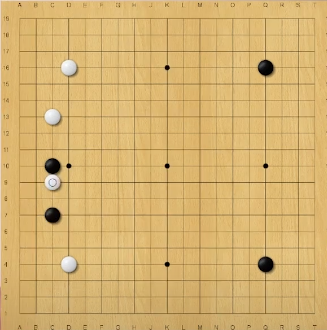
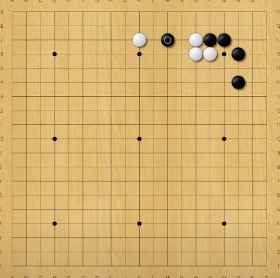
Bad Shape #1: The Empty Triangle.
 The representative bad shape. If you don't understand why the empty triangle is bad, you can just say 'this move is bad because it's an empty triangle'. For now. The priority is to make it a habit to not play bad shape.
But just as a thought experiment, lay down three stones in a straight line and three stones in the shape of an empty triangle. Now count the liberties that each group has. Remember, both of these shapes are using the same number of stones.
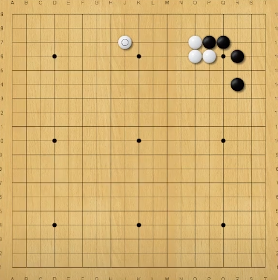
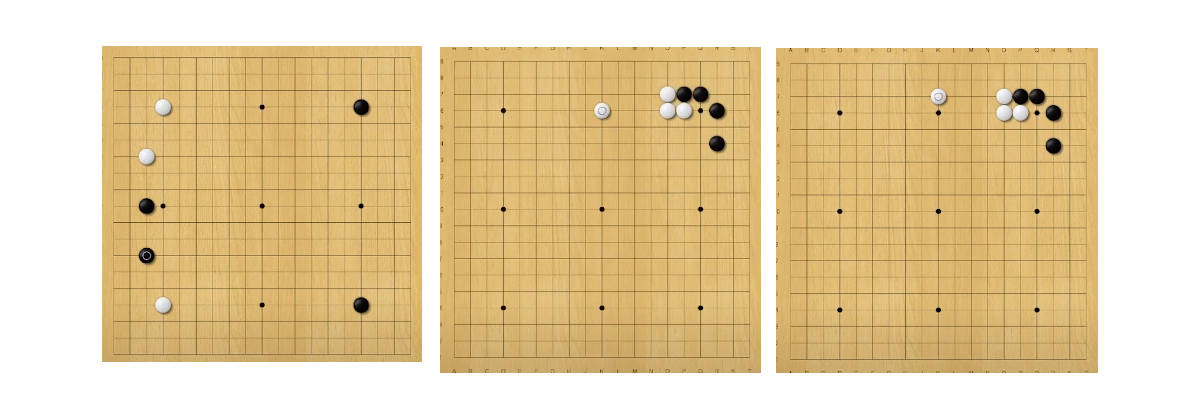
Example:
Black to Play
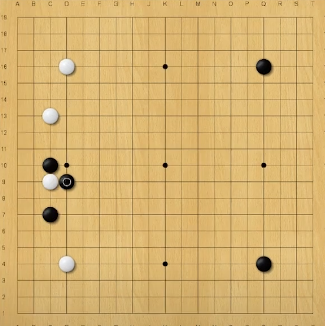
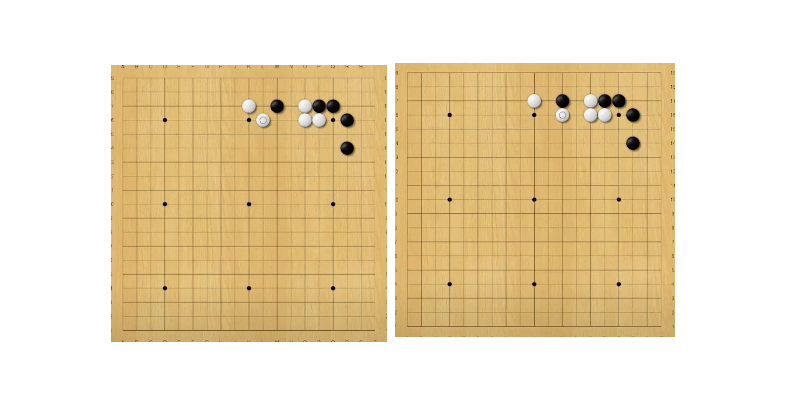
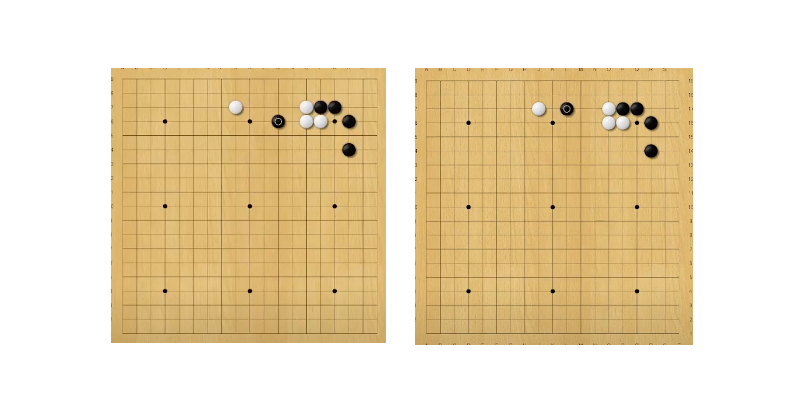
 White extend. Now the problem here is how to respond without making bad shape.
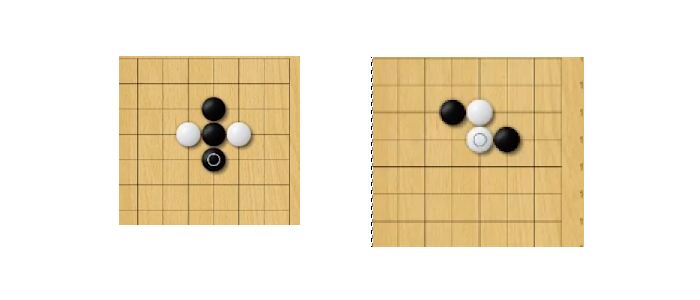
empty triangle
 This response covers for the connection, but as you can see, black has formed an empty triangle.
empty triangle
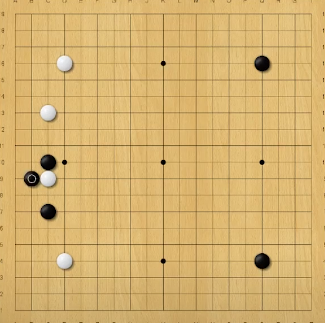
 Here's another response that results in an empty triangle in black's shape.
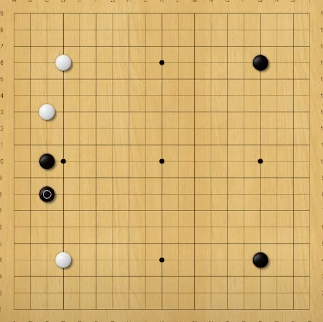
bamboo connection
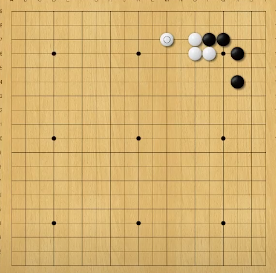
 So looking past the previous two ways, we come across this response. This time, we avoided making an empty triange. We instead have a good shape, called a bamboo joint. This automatically moves this response up to the top of our list, compared to our previous two ideas.
indirect response
 This is an indirect response that you could think of to avoid the empty triangle, but it does leave behind a weakness. According to katago, the previous move is the best candidate, but this move would be better than making an empty triangle.
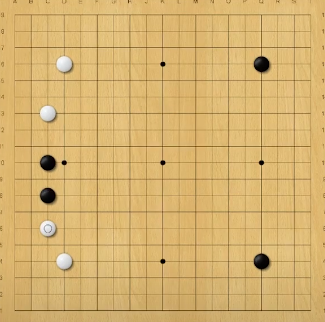
Bad Shape #2: The Split Shape
Example #1:
 I think this one you've seen, an all too common mistake that allows the shape to be completely broken.
Similar to the empty triangle, there are exceptions to the rule, but the first priority is to learn to play the game while avoiding this split shape.
I think this one you've seen, an all too common mistake that allows the shape to be completely broken.
Similar to the empty triangle, there are exceptions to the rule, but the first priority is to learn to play the game while avoiding this split shape.
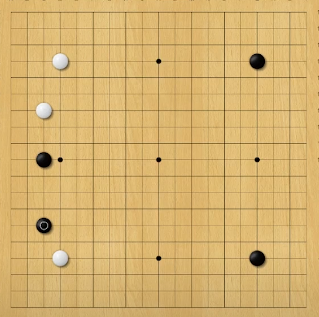
Example #2:
 This too, is an example of split shape. From black's perspective, this is almost strictly forbidden. From white's perspective, we absolutely jump on the opportunity to split this shape.
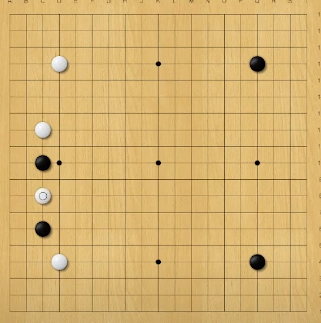
Example:
In practice
 Let's see an example of how this shape may arise in your games.
White has just played in between these two black stones. And here, black has to be careful to avoid the split one space jump and the split knight's move shape introduced earlier. Let's first take a look at the two responses that black must not play.
As you can see, these two responses by black give white the clear cut follow up to split your shape apart.
 This is now white's only move. And black has the split shape.
 Looking at this shape, we see that here too, white has an only move. and black is broken.
So in this position, our goal is to avoid the above two moves and find another way.
Rather than pushing to give white the only move, black can back off like this and the result is much better.
And rather than pushing from above, lightly playing the knight's move is much better.
To put it another way, if we choose to play on the right side, no matter what we choose, white will push up. And so if you imagine that white already has this move, where would you choose to play, the push up against the white stones? Or rather this kosumi towards your bottom right enclosure? I think it's pretty clear that this kosumi is doing more for the bottom right area than the extend.
 And if you decide to play from above instead, white will always push here. and black will extend back.
Now if given the previous position, would you have this extend against the white stones? Or would you rather have this knight's move? I think most of you would prefer to have the knight's move.
Nothing will trump an understanding of the reasoning for these guiding principles, but the first priority is to simply ingrain the habit of not playing split shape in your games.
Regarding the exceptions, if you are already at dan level and the situation calls for it, then with the awareness that this is an exception to the rule, and the resolve to play it anyways with full acceptance of the risks associated, you can consider it. But if the awareness and distinction is not there, and you blindly allow the opponent to split your shape, your go will not take form and will crumble.
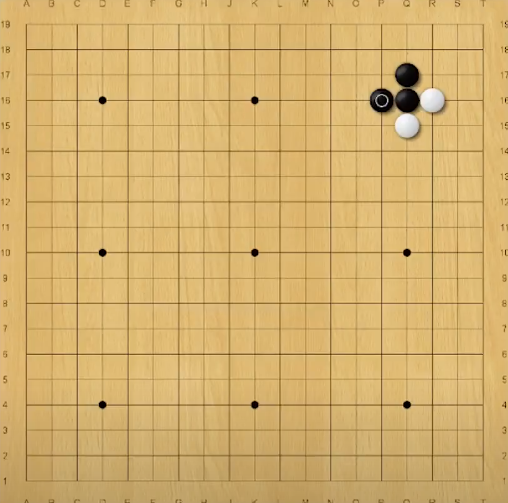
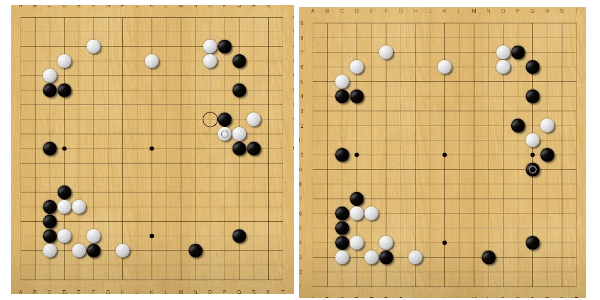
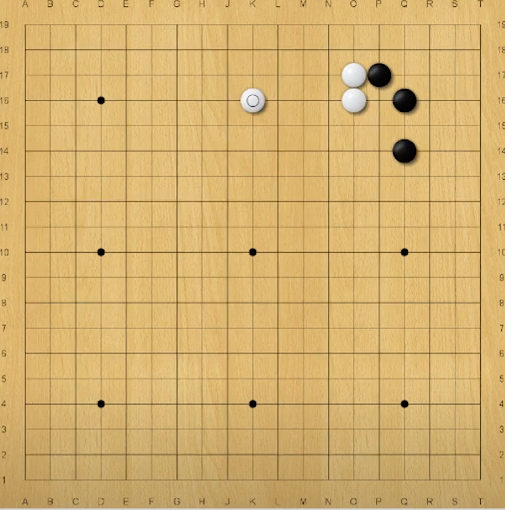
Bad Shape #3: The Raw Peep
Example #1:
 For this one, perhaps it's the first time you've heard of such a rule. This one is slightly less severe of a mistake than the empty triangle and split shape, but in some cases it can be even worse. Consider these three the top 3 of bad shapes.
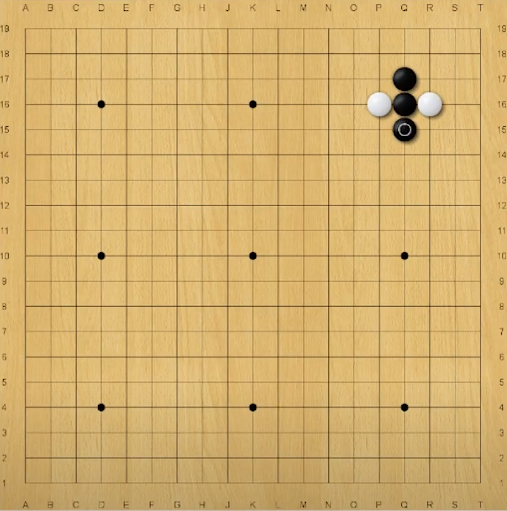
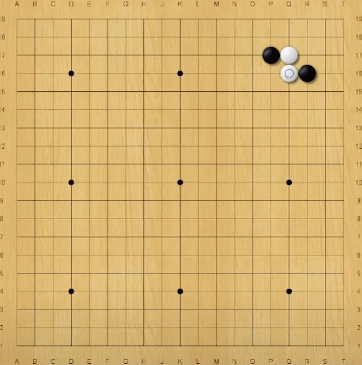
The definition of "The raw peep" is, when you peep a cutting point when the direct cut was working.
If we look at it another way, you're finding a cutting point that the opponent is likely thinking of fixing, and then peeping it to help him find the timing to fix that cutting point. Essentially, from your opponent's point of view, it's a thank you move. Let's look at an example.
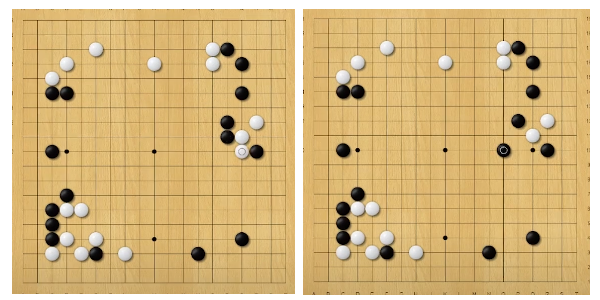
Example #2
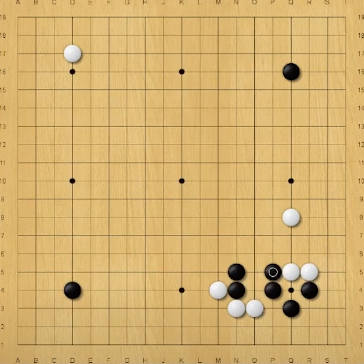
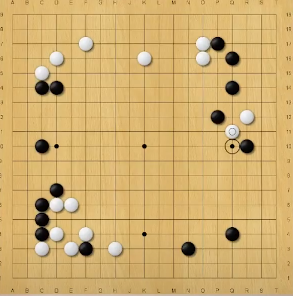
 There's a fight in the bottom right quadrant.
 White peeps this cutting point, and this is the example of a raw peep.
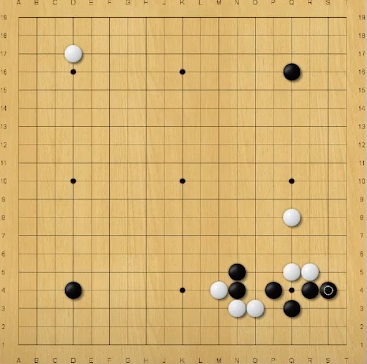
 Black's only move is to connect. Sure, it was a tiger's mouth so you may think that hey, there was no direct cut here.
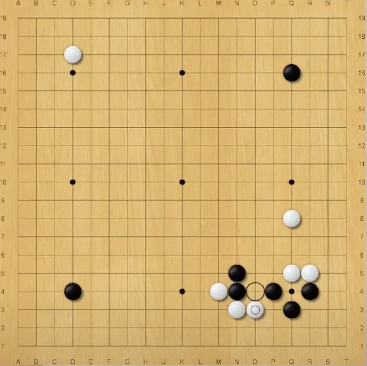
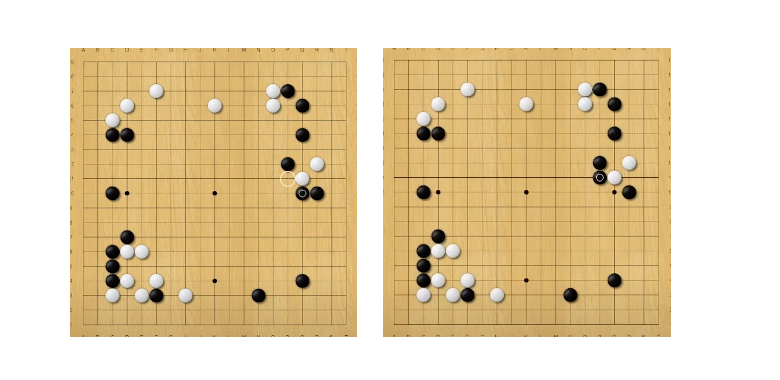
 But before the peep and connect exchange, white had this cut, which isolates black's center group in sente.
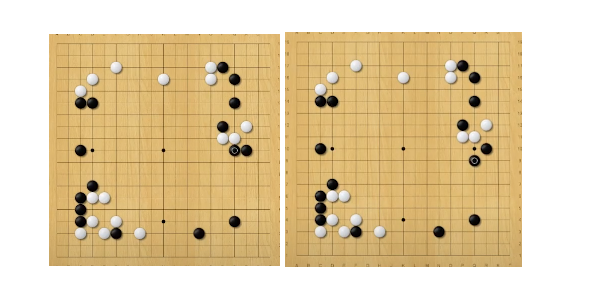
 White can then move from his group on the right side because it's not alive yet, but as you can see black's center group now has no eye shape and is looking very unstable. It might even get attacked.
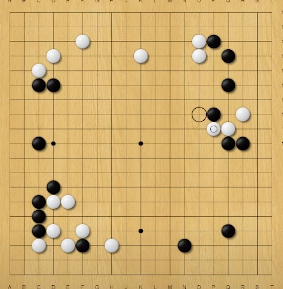
 But if we play this raw peep, we lose the chance to cut off this center group in sente, and when we run with our weak group, black's center group now has the insurance of being able to connect back to his bottom right corner. This gives black a lot of assurance going forward because he can always avoid the worst case sceneraio by connecting back. And due to this, we can say that the peep has strengthened black's center group, and inadvertently hurt our own group on the right. This severely disrupts the power balance in the upcoming center fight for no good reason at all. Let's compare the two outcomes.
I think it is clear to most that black having this insurance makes a very big difference in the balance of power in the center fight.

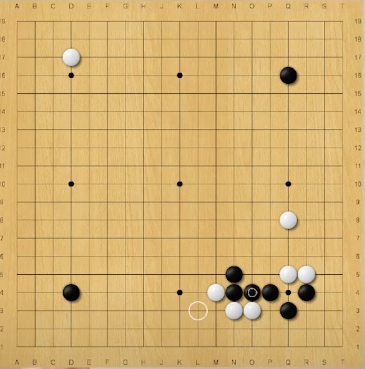
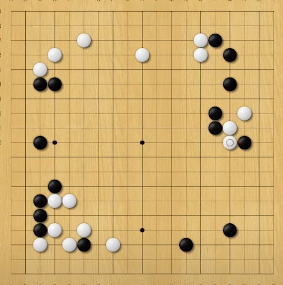
Now if things were different and black already had this connection...
This peep would then be considered a forcing move that makes no waste.
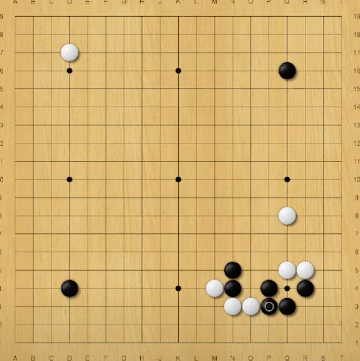
Let's compare the two peeps.
I think it's clear that these two peeps have completely different meanings. I believe that many players peep cutting points with a light hearted view of the exchange, perhaps misjudging the exchange as not much of a waste... which is a scary situation when you realize how severe of a mistake this raw peep can be. So before you peep a cutting point, make sure that the direct cut doesn't work, and make sure you're not aiding your opponent in fixing his worries, so as not to play the raw peep.
Good Shape #1: Three space extension from a two stone wall
 This one is more of a proverb on good shape than an example of bad shape. It explains the efficient shape of stones. Let's see why this is considered as the standard shape.
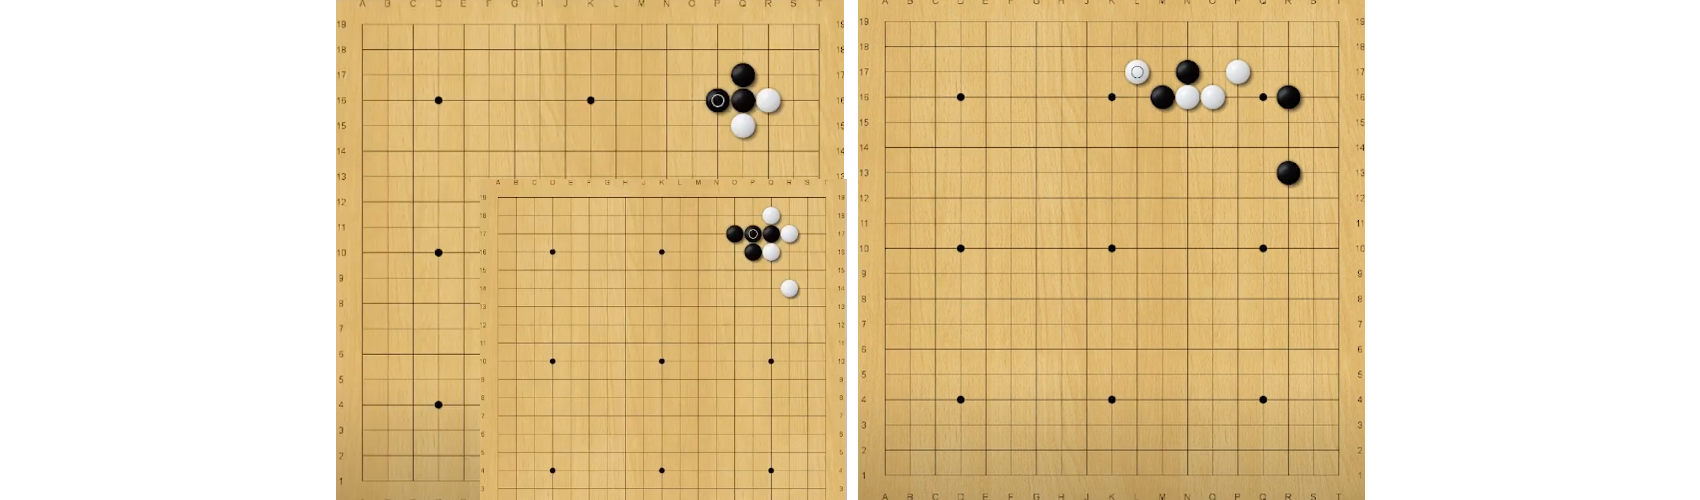
 Perhaps you have seen this pattern in the corner before. Up to here, it is a common joseki, but here the question for white is where to play the extension. Notice how the three white stones form a two stone high wall facing the left side of the board.
Examples:
Now according to this proverb, these two moves, the three space extension on either the 3rd or 4th line, are locally the standard way to extend. This is a very popular joseki so I'm sure most go players know this as the standard pattern, but why is it two stones? Why is three spaces the most balanced and standard extension? Let me start by talking a little bit about what an extension is in the first place.
Black to Play
 Let's say black splits the left side and white approaches the stone from above.
 Black makes this two space extension. Now when asking what an extension is, you could say that this two space extension is THE standard extension. Among extensions, the two space extension is considered the most standard. And the reasoning is simple, it is the most efficient distance to make eye space and territory. The theory of extensions is, to make the largest extension possible where they will still be connected.
 Even if white plays something annoying like this,
 Black can hane on top in most cases,
 Or at the very least hane under and stay connected.
 So unless under special circumstances, there is no reason why we should play such a cramped one space extension.
 If white plays a checking extension yet again, we see that black has less eye space and territory than he would have had with the two space extension. And so, why play the one space extension when you can play a two space extension. So yes, the two space extension trumps the one space extension.
 Then how about the three space extension? Compared to the one space jump, this one is a viable move. So both the two space and three space can be played and they will both be a good game of go.
 But locally, due to a splitting move existing, the three space extension off of the first stone is not considered a standard extension.
Now that we've covered what extensions are, let's return to the topic of three space extensions off of two stone walls.
 If we look at this common joseki once again, perhaps you now have a better understanding of why it's specifically a three space extension in this case. Within the range that is still connected, it's the most efficient distance for eyespace and territory. We are looking at it exactly how we were looking at the previous two space base/extension. Just this time, instead of taking a base for a single stone, we're taking a base for a two stone high pillar.
 This time, even if black tries to split the shape,
We can play like this and contain black on the inside. It's a connected shape.
 On the other hand, if we take a more cramped stance with the two space extension, we're wasting the reach that the two stone pillar could have afforded. The cost is that we have less eyespace and territory. So when we extend off of one stone, it's like a car. It has a speed limit of let's say 60 mph. So we take the two space extension. But the two stone pillar is not a car, but more like a bullet train, with a speed limit of 199 mph. So we take the three space extension. Because of the extra strength in the two stone wall, we can afford to increase the speed and increase the distance of the extension.
 And so a one space extension would be a waste,
 And the four space extension would allow the opponent to split the shape
Like this or this. And because this splitting option by black worries white, it's kind of like if you were on a bullet train and somehow the train was going 300 mph. it's slightly worrying, let's say. But this four space extension isn't unplayable, but locally as a method of extending from the original group, it's not a standard play.
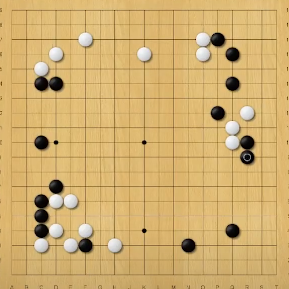
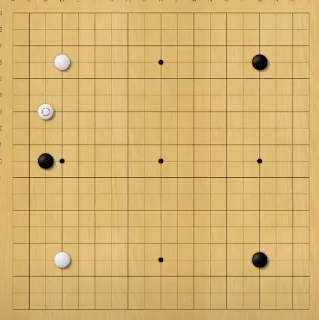
Let's see a practical example of how we can use this to aid our decision making in a real game.
Black to Play
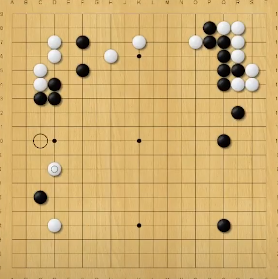 White plays a pincer in response to black's approach move on the bottom left corner. Take a look at the group on the upper left hand side. Black has a two stone wall facing the left side of the board.
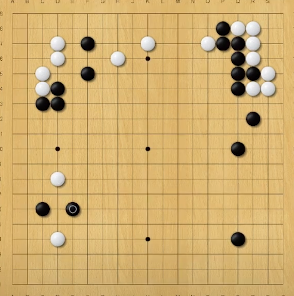
Over Concentrated
 If we end up playing this two space extension from the two stone wall, we're playing a cramped shape where we should have been able to play a three space extension. And so, we're contradicting the proverb: two stone wall, three space extension. And the cost is that we're taking an inefficient shape. Now, perhaps you thought ;;'hey, isn't this a good move because we're reinforcing the top group's eyespace? Not only that, but we're sort of pincering white's pincer stone and making it weak! We're killing two birds with one stone here!'
Well, you're not wrong, but the fact remains that you are making an inefficient shape to do so, by playing a two space extension when we really wanted a three space extension for good, efficient shape. The two space extension is slightly cramped, and the eyespace we get is worse than what we wanted. And unless the situation is dire and the eye space is urgent, we don't want to play like this.
If we end up playing this two space extension from the two stone wall, we're playing a cramped shape where we should have been able to play a three space extension. And so, we're contradicting the proverb: two stone wall, three space extension. And the cost is that we're taking an inefficient shape. Now, perhaps you thought ;;'hey, isn't this a good move because we're reinforcing the top group's eyespace? Not only that, but we're sort of pincering white's pincer stone and making it weak! We're killing two birds with one stone here!'
Well, you're not wrong, but the fact remains that you are making an inefficient shape to do so, by playing a two space extension when we really wanted a three space extension for good, efficient shape. The two space extension is slightly cramped, and the eyespace we get is worse than what we wanted. And unless the situation is dire and the eye space is urgent, we don't want to play like this.
Then what is the alternative? We know that because of shape, we want to avoid this two space extension.
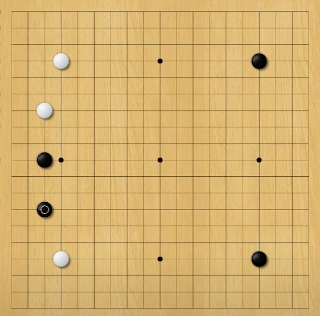
The right idea
 Although black's top left group doesn't seem to have eye space, it's not really a weak group. It's actually a very stable group that we could even treat as thickness. Given this analysis of the strength of that group, we can actually just jump from the pincered stone for now.
 Let white respond,
 And cap with the knight's move.
The balance of power has shifted in black's favor. White is in a tough spot, and black can gain control of the flow of the game.
And cap with the knight's move.
The balance of power has shifted in black's favor. White is in a tough spot, and black can gain control of the flow of the game.
Of course, like any rule of thumb, there are exceptions to the rule where ignoring the rule is the sensible move, but due to the inefficiency you create in your shape, it's very important to keep this proverb in the back of your mind.
Now, we move onto the final topic.
Good Shape #2: Hane at the head of two stones
This hane, for either side, is a vital point. you may not understand why these hane's are a vital point, but first and foremost, please just remember to just immediately play the hane whenever you see two iron pillars stuck to eachother. Whoever get's around to this hane first will be better locally.
We can say that for either side, the hane starts the process of constricting your opponent's liberties (dame-zumari), or that this aims at good follow ups, but the order of priority when learning as a beginner is to simply remember to hane the head of two stones.
Example #1:
White to Play
Example #2:
Black to Play
This is why we would prefer to think about these two hanes, rather than the bumping move. When thinking about the proverb, hane at the head of two stones, not only is it important to recognize when you have the opportunity to strike the vital point, but also as important to prevent playing in a way that gives your opponent the hane at the head of your two stones.
Recap
The Good:

The Bad:
The Ugly:
Conclusion
As I mentioned at the beginning of this article, these are the shapes that make or break your foundation.
While active learning and acquiring new skills and knowledge contribute to your improvement, negating the bad habits will double the effectiveness of your efforts.
Remember, Shape is more fundamental than Sacrifice, Attack, or Direction of play. The most important to get right, only second to the corner stone concept of Strength of Stones.
-Hiro Nakae

